I just love my Ashford Knitter's Loom. Talk about easy! I have been able to make lots of great things. I have run into a few people who, for some reason, were shown a very difficult way of warping. They became extremely discouraged. There is a very simple way to warp this loom. The instruction book that comes with the loom shows the method I am about to describe. Additionally, they sell an optional DVD that demonstrates the process, and it really helps too. I strongly suggest their DVD. At any rate, I took a lot of pictures showing how I warp my loom, and you will find this helpful. You will see how easy it is, I bet you will get a loom and start making your own beautiful things.
The very first step is selecting the yarns. You need to pick out colors and textures. I just pile my yarn up and walk by for several days adding and subtracting until I get something I like. For the warp, you must choose some very strong and smooth yarn. Your reed is going to run back and forth over it and there will be tension applied to the yarn. Any yarn that can't hold up to the wear or tension is definitely out, and any yarn that is very bumpy is going to just kill you when you try to slide the reed up and down.
Now I will tell you a tip I discovered when starting a project. I actually used a 3-ply alpaca yarn -- this is a very delicate yarn -- and didn't put much tension on it. Instead of using the reed to open the shed and pack the yarn, I used a batten (a stick for opening the shed) . This cut down on wear and tear. It took longer to make sure I opened the shed correctly each time, but it was well worth it. Don't try something like this for your first time. Use something slick and sturdy.

Now, you would usually take your loom off the stand and clamp it on the table with the clamp set that comes with the loom. I'm lazy and showing you the easy way. If you have your loom on a stand, just place it against a table like I have it here. Put your reed in the top most cradle in the middle. Make sure the notched side (right bottom) is on the far side of where you are going to pull your warp threads. I'm going to pull my warp over to the far left and loop it on a chair ear. Don't forget about your brakes to keep your winder things from unwinding. As you see, the one on the right is in the correct position, while the one on the left is just hanging there. Also, turn your winding bars in so that those warp stick are toward the center as pictured below. Be sure to take note of the boot shaped latch and the notch under the reed there by the camels neck. You will need to know this for way later. This picture also reminds me that I have to make some wine. The equipment is just sitting there.

Okay. Now I am making a table runner for my sister, so I just happen to use my table and the measure for my warp. Remember, you are going to waste a foot of warp on each side. You can make things real complicated and get a warping board, but I just eye ball the length and add a foot on each end. It's not exact, but close enough for me. I have that chair ear (yes that thing sticking up from the chair is called an ear) centered right in the middle of my reed. Hope you can tell that in the picture below.
That brings me to picking the reed. You must pick one with slots and eyes big enough to accommodate the size of yarn you will be using. Mine is a really fat yarn, so this is a 5.0 reed. To measure, you can just stick the yarn in the eye and if it fits, it works. Easy right

Here's another picture of that chair. Hopefully you can tell that the ear is almost dead center of the reed at the bottom of the picture. If you don't have a chair like this, you can always use that peg that comes with the loom and clamp it to the end of the table. But why do all that when you have a chair?

Now we will start warping. Take your warp yarn and tie it with a square knot to the warp stick farthest from the table. As you can see in the picture, I just tossed the yarn ball on the floor. Just lock up your cats and small dogs, because you may find it harder to warp your loom with a dog or cat on the end of your yarn.
Take that yarn and pull a loop thru the the first slot. Now, I did this a little further in so you could see better.
Take that same loop and pull it all the way across the table (or open floor, whatever) and loop it onto the chair ear. Keep light tension in the yarn. Don't let it lay on the table, but don't stretch it either.
You will find that the yarn will lie naturally the way it is supposed to wrap around the warp stick. Just study the picture below how the yarn is just picked up. Pull this next loop thru the very next slot.
Just make sure that each time the yarn is wrapping the warp stick and shown below.
Repeat this process over and over until you want to change to another color or have to start a new ball of yarn. It takes a lot of yarn to warp a loom. When you get to a place you want to change, just tie your old yarn off on the warp bar with a square knot and tie your new yarn on. That simple. See picture below. We are starting a new color.
Just keep going until you have your entire reed filled. Now this is a 20 inch reed which means that my project is going to be about that wide. If you want something thinner, just measure off on the reed and only warp that many slots. Your loom should look like this one below. More or Less.
This next picture is how your warp should look going across your loom to that chair over there. Notice that the tension is not loose but not tight either. Also, it goes straight to the center.
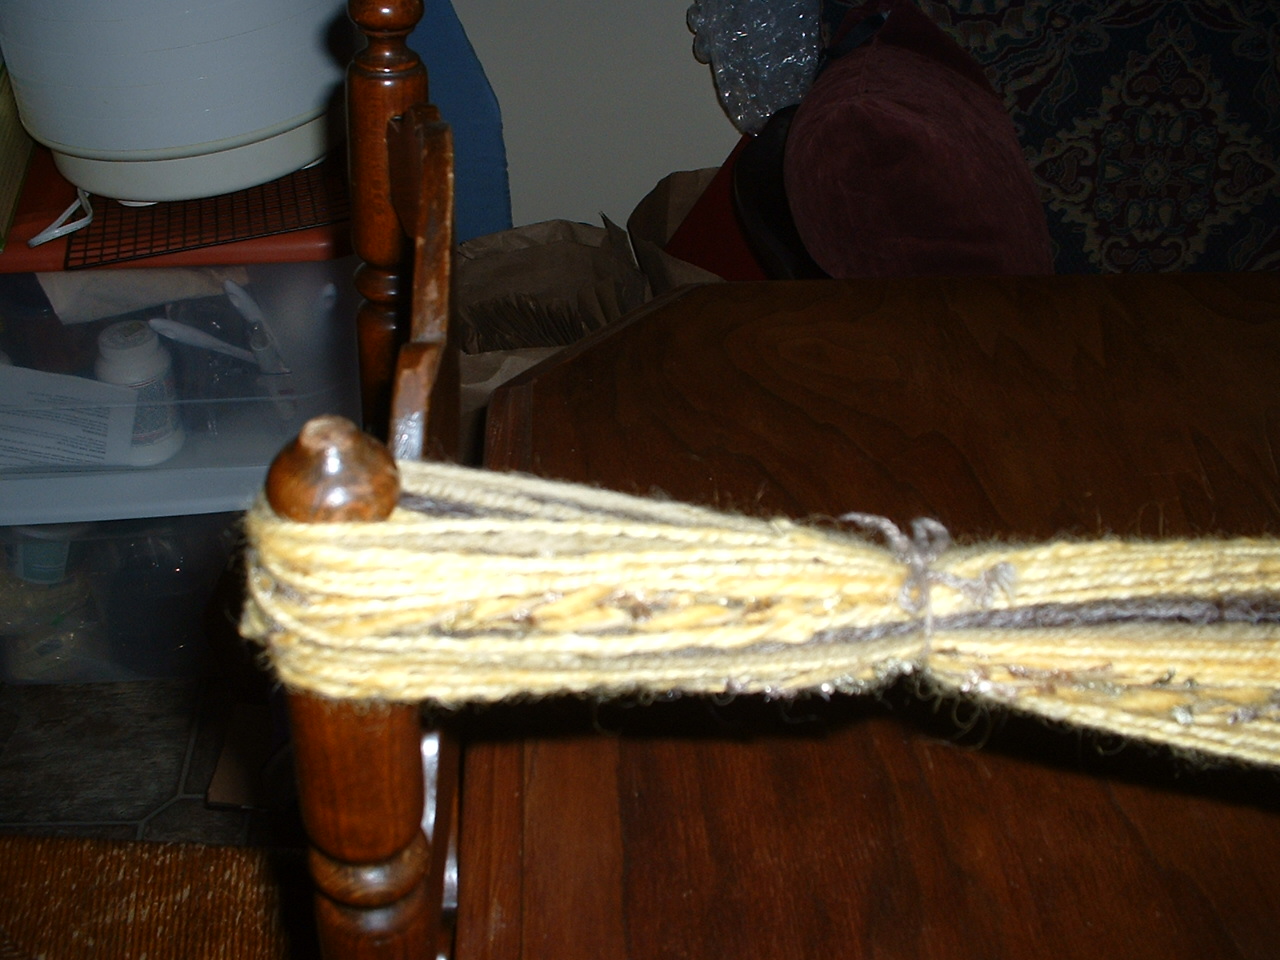
Take a scrap piece of yarn and tie your warp yarns together about 6 inches from your peg or chair ear.
This is where you are going to need a little help. Have someone hold the yarn with light tension as shown below. They will move forward as you wind the warp, but continue to hold light tension as you do so.
As you wind the warp up on your back roller, place paper on the roller as shown so that you can keep each layer of warp separated. I use pattern tracing paper for this because it comes in long rolls. You could use a roll of parchment, wax or freezer paper. The paper needs to be as wide as your project. Don't forget to use that break thingy we talked about earlier to keep the warp from unwinding.
Here is another picture showing how the warp yarns are being held separate by the paper.
When your helper's hand reaches the far side of the loom and your scrap yarn tie is even with the far warp stick, stop winding the warp.
This picture just shows the scrap yarn even with the warping stick.
You can pin up your extra paper to keep it out of your way.
Take scissors and carefully cut warp loops.
Now your warp threads should hang like this. There should be 2 threads per slot with no skipped spaces.
You are going to start with the first two threads on one side. Make sure you have both in the same slot and don't grab one from another space.
This is really important, so I gave you another picture. Only work with one slot at a time.
Take your hook and pull one of the threads thru the eye next to the slot.
Now you should have one thread in the slot and one in the eye.
Go across and do this for each pair. When finished, your loom should look like the picture below.
Now you are ready to tie onto your warp stick. Hold 4 paris of warp threads as shown.
Holding tension, wrap warp threads around warp stick as shown.
While keeping tension, tie knot as shown. Don't stretch yarn. Just firm.
Continue across till you have tied all your warp on the warp stick. You may end up with less the 4 pairs at the end of the line. Just split evenly and tie.
Your loom should look like this when you are finished tying your warp to your warp stick.
You are now ready to weave. The side of the loom you ended up on is the side you will start weaving from. Loosen your side knobs (the knobs on either side in the center of your loom with the reed) a little and bend the back of your loom (the part with the warp wrapped around the paper) up until the blocks engage. You will find these blocks under your reed bracket. Please refer to one of the first pictures with the loom laid out by the table. You will see the little block and the boot shaped latch right under the camel's neck ( you probably saw that camel in the background). When engaged, tighten up your side knobs.
Release the brake on the roller with the warp and paper and unwind about 6 inches of warp. Then use the roller closest to you and wind the warp up till tightened. You will also have to make sure the break is on that roller as well to keep it from unwinding. Keep adjusting in small increments until your yarn looks evenly spaced. This is where some of that waste comes in (if it's a scarf or shawl, this will be your fringe). When the yarns start to look even, place a folded up paper in your open shed as shown below.
Now push the reed into the down position to open the next shed. I placed a batten to open the shed better and started my first weft yarn here.
Now push the reed into the up position to open the next shed and bring the weft yarn back thru. Don't pull the weft tight. Leave a little room at the ends.
Congratulations, you are weaving. If you don't know how to weave yet, please pick up some books on rigid heddle weaving. Ashford even has a book out on weaving with this loom. You will really like it.
Just use your imagination and go wild. Use all types of yarn ( Hand spun, store bought, wool, silk, ribbon, or what ever).
Continue this process till you reach the end. When your weaving reaches half way to your reed, stop and release more warp from you back roller and wind your weaving up on the roller closest to you until you have nice firm tension.
This is my sister's table runner finished and ready to pack for Christmas. I had to wait till after Christmas to post this tutorial because she would cheat and take a look.
E-mail me for any questions. I'd be glad to help. Happy weaving.
~~~~~~~~~~~~~~
P.S. Heddle Positions
 |
| Heddle in Up position |
 |
| Heddle in Lock-Down Position |